
Scan123 Browser Based User Guide
Welcome to Scan123!
If you are reading this, you have already taken the first steps in seizing control of your document management and digitization practices; congratulations! The following brief guide will give you an overview of the different facets of the platform as well as provide some steps to ensure the best possible experience. More in depth information can be found in our Knowledge Base at https://knowledge.scan123.com/. But for now, let's dive in...
First, take a moment and make sure each scanning PC meets or exceeds the requirements for Scan123. This step can prevent considerable headache in the future. Our recommended specifications are as follows:
OS: Windows 10 64-bit
- Processor: Intel Core i5 or AMD equivalent
- Memory: 8 GB RAM or greater installed
- HDD: 15GB free disk space available
- USB: 2.0 ports
After ensuring your scanning computer meets the baseline requirements, the next step is to load both the Dynamsoft browser scan extension and the drivers for your scanner of choice.
Once your system and scanner meet the specs, the next steps will be to load both the scanning app program and driver. Up to date app versions can be located in your welcome email, or alternatively at app.scan123.com.
Once these applications are installed you are ready to setup your initial Scan123 account. This will come in the form of an invitation email sent by your administrator. Follow the directions within to set your password and gain access to Scan123 - both to scan and to look up documents
STEPS FOR SUCCESS
Digital document management is like any other thing: preparation precedes performance. The following section will illuminate the steps you can take to ensure your company has the greatest possible return on your Scan123 investment.
Firstly, prepare these documents for scanning. This will entail reordering as needed, removing ALL staples and paperclips, and seating them neatly and uniformly in the scanner tray. Misaligned documents will jam the scanner and may damage your papers.
Second, the organizational structure you create will be immensely helpful to your experience. Think of Scan123 as a digital filing cabinet - If files are mislabeled or in a different drawer than meant to be that will create headaches for the company. For this reason, we recommend naming your documents as simply and clearly as possible.
Your scanned documents will have a file name, folder name, and the option to add keywords. Think of this like how you name your files on your computer. How will you or your coworkers be searching for these files later?
Name files and folders in a consistent manner so that searching later is simple.
Generally, you will want to name a document with a unique number that corresponds to that exact documentation, such as: deal number, repair order number, check number.
Adding keywords to your scans and uploads will give you more ways to find your document later. Keywords of your document could be: customer name, vendor name,
phone number, or other useful information.
Qualifying VelocityFile companies also have full page OCR search, a feature in which every word on every page automatically becomes a searchable keyword, in these cases you can consider manually entering keywords to be redundant.
If you are scanning or uploading more than one document to a folder, make sure to name each scanned or uploaded file with a unique name so that you can differentiate the documents later.
Your initial cabinet structure will have been built in advance by support. Additional cabinets can be generated by request. Scan123 handles all cabinet creation and modification, for cabinet needs contact support.
A primary driving reason for these naming conventions is the Scan123 platforms capability to merge data from your DMS and populate additional information onto your scans to increase usefulness and searchability, such as customer names, VIN’s, phone numbers and business names.

The process of generating DMS reports will be painlessly handled by support, and depending on the specific DMS, may be totally automated. DMS reporting frameworks need to be built usually after some scans have been generated, this feature will not be immediately available - please contact support to begin the reporting process.
Lastly, the scanners will need periodic service to continue functioning as intended. This will usually consist of wiping the scanner glass with a soft dry cloth. Furthermore, after several hundred thousand pages the pick and place wheels which physically contact your documents will begin to wear down. This will result in warning messages on your scanning machine well in advance of when it becomes a functional problem. These parts can be ordered and replaced as part of a consumables kit, supplied by your scanner manufacturer.
SCANNING!
Now that your documents have been prepared and your organizational structure is in place, it is time to begin generating scans!
To do so, we will be working in the “app”, the Scan123 website accessed through your scanner connected PC. Log in to the Scan123 app with the credentials set up previously and place your documents into the scanner, usually placed face down in the scanner tray. If you are a member of multiple companies, please switch to the correct company using the top right located “switch companies” menu. Once you are prepared, select the SCAN tab from your left hand navigation bar.
At this point, you will enter the browser scan platform. The scanner and profile pages will be automatically populated and will almost never need to be changed.
There are two ways to scan documents into Scan123 - single and batch scanning. All customers will have the ability to scan 1 document group at a time into the system using browser scan. For added efficiency and productivity, companies with the VelocityFile package will be able to scan documents in batches, limited only by the maximum capacity of your scanner. These VelocityFile enabled scans will also use optical character recognition to populate document names and give you significantly increased searchability. If you are interested in VelocityFile, contact your sales representative at 503-874-1000 option 2.
Single Scanning Workflow -
At this point, after selecting your cabinet, you can now enter your desired folder and document names. Your folder name is most important as it will dictate how your scan is filed. If the document field is left blank, it will copy the folder's name, which is usually ideal. Entering a distinct document name is useful in cases where you are adding additional documents into an existing folder, to facilitate differentiation of scans.
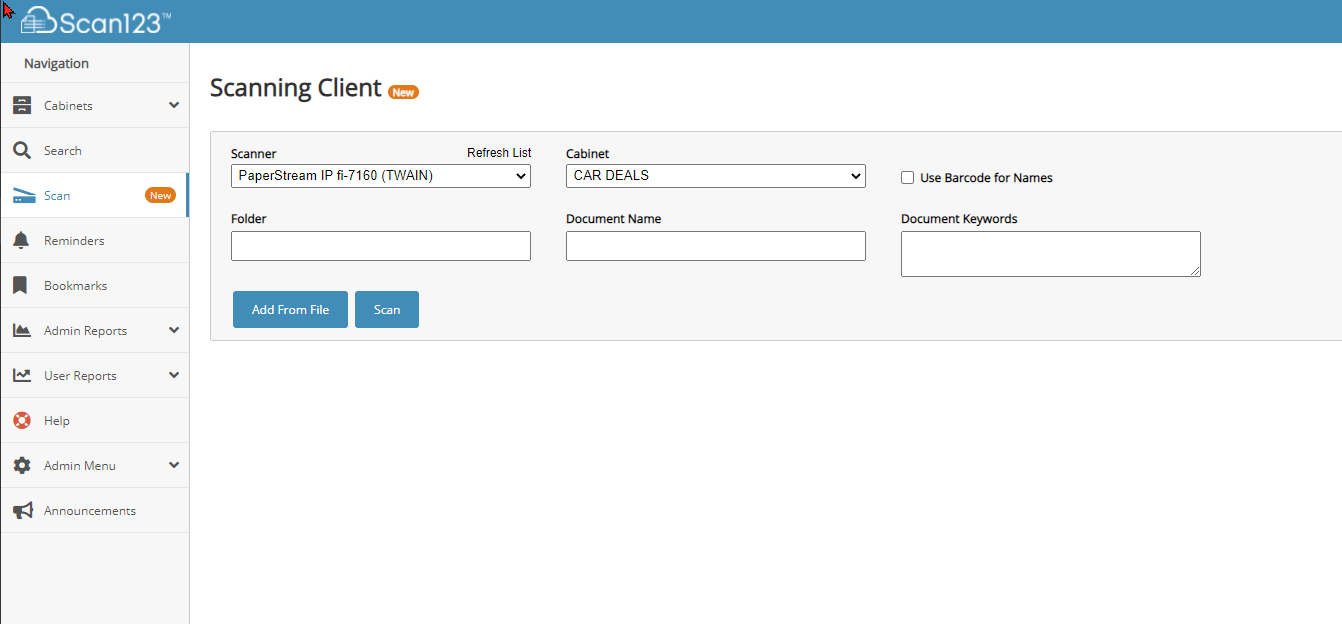
Once you have selected your cabinet and entered your name, you may now select the SCAN icon to process your documents.
Once your documents have been fed through you will be presented with thumbnails of the pages scanned. At this point your scans are not yet in the system, and you can check to ensure that they are acceptable.

You can do several things while on this screen. Pages may be reordered by drag and drop to their desired position, they can also be rotated if scanned sideways.
If an error was made in the name, you may use the pencil icon to edit the folder and document names.
If the document is not acceptable at all, use the X icon to erase the scan and try again.
Once you are happy with the images, simply click UPLOAD - it’s as easy as that!
Batch Scanning Workflow -
Qualified VelocityFile companies have, in addition to single scanning, the ability to digitize documents in batches. Your browser scan system has the ability, after a brief configuration, to detect the end of one document and beginning of the next, as well as naming itself automatically using character recognition.
After selecting the correct cabinet, which will have been configured during your onboarding, you will see the folder and document name fields have been removed. This is because your VelocityFile enabled cabinet will name documents automatically.

From this point, prepare and load your documents as normal, in batches of multiple documents.
Selecting SCAN will feed them through, and after processing you will be presented with thumbnails of your pages broken out by group.
At this review phase, you can check your batches for accuracy, looking at each distinct group to ensure correct information has been grabbed. Errors can be correct through clicking the pencil icon if needed.

Pages can be reordered by drag and drop, and can also be broken out into a new document by dragging them into the Create New Document field at the bottom of your screen.
Once we are happy with the naming and order, click upload to file the batch of documents.
App Features
The Scan123 webapp will be your central area to oversee and view all of your stored documents. This site is accessed by navigating to app.scan123.com, and logging in with your account email and password.
On logging in, you will be presented with your home screen and a display of all cabinets you have access to and a navigation bar with further features along the left. You can click into a cabinet to search for a document and download a scan.
If you belong to multiple companies, you will use one email address to login and manage multiple Scan123 company accounts. Click the
company name in the top right of your screen to toggle between
your companies. If one of your companies is not present, you have
not been granted access to view their documents. Contact a
current admin at your company to request an invite.
Search for documents in Scan123
There are multiple ways to find your files in Scan123. All of the search options are dependent on your Cabinet permissions. If you have access to the cabinet the document is held in, you will be able to find it. If you do not have access, the document will not return in any searches. To update Cabinet Permissions, refer to the Admin
Menu section (You must be an admin to update Permissions).

Global Search
Global Search searches all Cabinets. This is especially helpful if you aren’t sure how your documents are filed in Scan123 or would like complete records of all of a given customer's interactions. This search returns all folders, files, and keywords that match your query. Enter a search term and click Search. Additionally, qualifying VelocityFile customers will be able to use this feature to search for any word printed on a scanned page using full page OCR search.
Any of the below search terms will return results:
- Folder name - example: Check Number “126846”
- File name - example: Benefits Renewal 01-01-18
- Keywords - example: Vendor Name, Check Date, Check Amount

Advanced Search
While on the global search page, you may click the “More” option to gain further search tools. This menu will allow you to tailor your search to meet your needs. In it, you can narrow your criteria by:
- Searching with a specific cabinet and/or folder
- Filtering by date uploaded before and after
- The user that scanned
- The type of file
- Metadata fields
After entering your criteria, simply press “Search: at the bottom to return results.
DMS Search (within a Cabinet)

If Support has enabled DMS Interfacing for you, keywords will import from your DMS Import routines, and you will be able to search by the terms listed at the top of the folder list (seen below). With this option, you can search using several fields imported from your DMS to find your document.
Use one or more of the fields to locate your file:
- Folder Name
- Last Name
- First Name
- RO Date
- Work Phone
Additional Cabinet Features
To create a new folder, find the cabinet where you would like to add the folder. Click New Folder, type in the folder name, and click Submit. From here you can now move a file to this cabinet by clicking the Upload button at the top.

To edit a folder, file, or keyword - when hovering your cursor over the name, a blue pencil icon will appear to the right of it, clicking this will enable editing of the given field.

To move folders, simply select the check box next to the desired folder or folders and click Move. Select the destination cabinet in the next screen. The same process will apply to moving files within folders.
ADMINISTRATIVE FEATURES
The Admin Menu portion of the left hand navigation bar exists to give Administrators tools to control the permissions and access into your Scan123 company. This menu will only be visible to administrators.
User Management

The user management menu option will be used to control privilege and access. Clicking into this will load a screen of all users in the company, and give you the option to edit or disable them. Selecting “Edit” for a given user will open a menu on which you may tailor the users abilities within scan123 to fit their needs and responsibilities. You may also elevate users to admins at the top. To disable a user, use the“Disable” option.

An Administrator will not have features available to designate because a Scan123 admin may do everything inside the company. This level of access is usually reserved for managers, supervisors and others with oversight needs.
Cabinet Permission

The cabinet permission tab is how you control the access to the cabinets wherein your documents have been stored. Different users will need access to different cabinets. In Scan123, there are 2 types of cabinets - locked, and unlocked.
An unlocked cabinet may be accessed and scanned into by all users with no restriction. This is usually useful for Parts and Service RO’s. Beyond that - new cabinets will default to locked. A locked cabinet may be accessed by Scan123 admins and users who have been given permission to the cabinet by an admin.
The Cabinet Permissions option will be the way to control that access. Upon clicking into the cabinet permission menu option, you will be presented with a list of all cabinets,and a list of your users below.
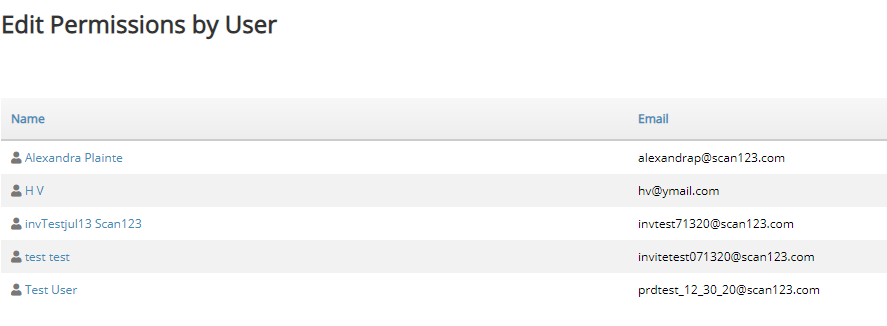
You may either click into the cabinet you wish to give access to and check the target user's name OR select the user's name from the cabinet permissions menu and check the boxes for the cabinet access they will need, clicking “save” when finished.
ADDITIONAL RESOURCES
This guide will help get you started taking control of your documents and their storage using the Scan123 platform. For additional guidance, visit our knowledge base at
https://knowledge.scan123.com/
Additionally, you can receive assistance by phone at
503-874-1000 option 1
Or email us at