Method 1 - via Scan123 Scanning Application
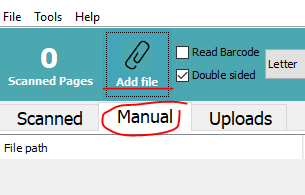
Launch the Scan123 scanning application > Login > Select the Manual Tab > then press Add to locate your file.
After pressing Add, you will see a new screen appear that will allow you to browse for your local computer and locate the file. Quick Tip: Before adding the file to Scan123, move the file onto your Desktop first to make it easier to browse to when doing the Manual Upload.
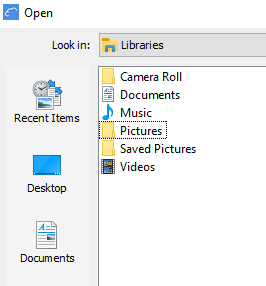
Once you have located your file, please select it and press Open. This should add the file to the list under the Manual Tab. From here you can edit the File Name and add any Keywords by double clicking the areas below the column and typing.

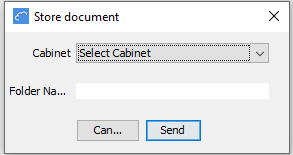
Once you have done that. The next thing to do is to upload the file by pressing Send File. The next steps are similar to the Scanning process. Please select the Cabinet and Folder Name it will be uploaded to.
Method 2 - via Web Application (app.scan123.com)
To do a manual upload you will need to log into app.scan123.com. Then you will want to go into the cabinet and then inside the folder where the file is being uploaded. Then you will want to press the Upload Button.
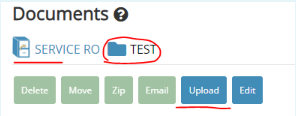
Note: You will only see the Upload button when inside a folder. If you do not see the upload button, you are still just inside the Cabinet.
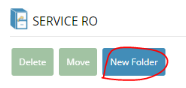
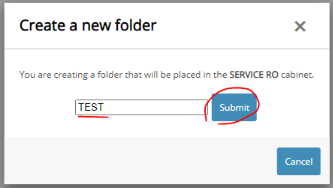
If you do not have the folder created yet, you can create the folder by pressing the New Folder option when inside a Cabinet. This will create an empty folder and automatically put you inside it, allowing you to see the Upload button.
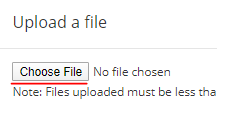
Once you press the Upload button, it will prompt you with a new window. Please press Choose File and locate the file you are attempting to upload on your computer. Select the file, Press Open and then Upload. This will upload that file directly into the folder you are in.